---
title: "Order TLS/SSL certificates"
url: "https://help.internetx.com/en/tls-ssl-smime/ordering-tls-ssl-certificates/"
lang: "en"
section: "TLS/SSL & S/MIME"
---
# Order TLS/SSL certificates
This is a step-by-step description of how to order a TLS/SSL certificate, using the example of a GeoTrust TrueBusinessID certificate.
## Step 1: Before ordering
- Create the [CSR key](/en/tls-ssl-smime/csr/) on the server where the certificate will later be used.
- [Create TLS/SSL contacts](/en/tls-ssl-smime/information-about-tls-ssl-contacts/) if the required contacts do not exist in the system.
- Administrative contact = applicant (identical to the details in the CSR key). The contact corresponds to the company that will use the certificate.
- Technical Contact = Reseller/Provider
- Check if a MX-Record is created so that the confirmation email of the CA can be sent. (Only required for authentication method EMAIL)
## Step 2: Ordering in the SSL Manager
- Click **Order Certificate** in the menu group **SSL Certificates**.
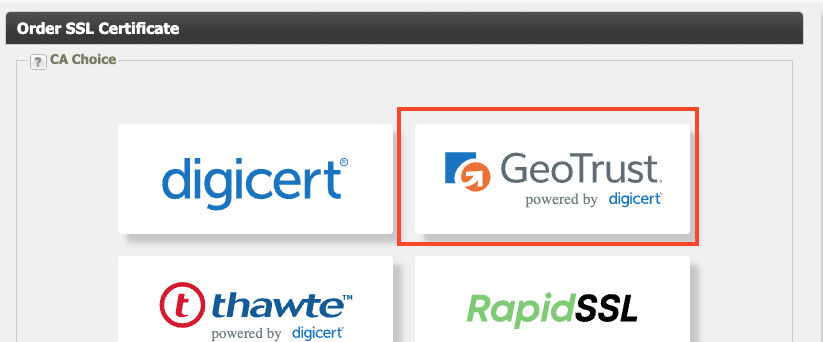
- In the main section, select the CA responsible for the certificate; in this case, GeoTrust.
 ### In the Product choice section
 - In the menu, under the **TLS/SSL Certificates** group, click **Order Certificate**.
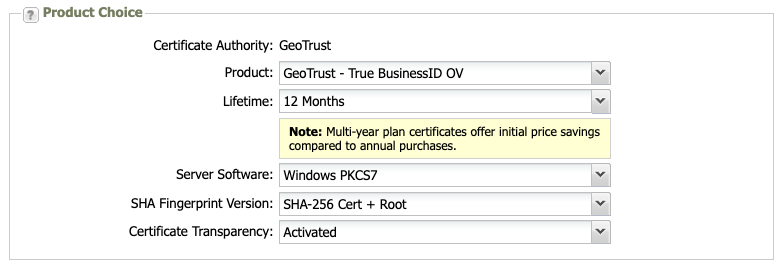
- Select the desired certificate in the **Product** list.
- Select the desired validity period in the **Certificate Lifetime** list.
- Under **Server Software**, select the operating system of the web server for which the certificate is issued. All Windows servers are automatically PKCS7 encoding format, all other PKCS12.
- For the **SHA Fingerprint Version**, choose between:
- SHA-256 Cert + Root: The current default. Returns a certificate chain in the SHA2 algorithm.
- SHA-256 Cert + SHA-1 Root: Returns a SHA2 certificate with the older SHA1 root certificate of the CA.
Certificates are only issued in the SHA-256 algorithm. The selection here allows you to choose between SHA-1 and SHA-2 root certificate issuance. The current standard is the complete SHA-2 chain (SHA-256 Cert + Root). The root certificate in SHA-1 is only recommended for old devices before 01/08/2013.
- Certificate Transparency is enabled by default.
What is 'Certificate Transparency'? With the 'Certificate Transparency' procedure, certificates issued by mistake or maliciously are to be better recognized for a domain. The digital certificates issued by a 'Certificate Authority' for encrypted Internet connections are checked and logged per default in a revision-proof logbook.
#### In the **CSR Key** section
- In the menu, under the **TLS/SSL Certificates** group, click **Order Certificate**.
- Select the desired certificate in the **Product** list.
- Select the desired validity period in the **Certificate Lifetime** list.
- Under **Server Software**, select the operating system of the web server for which the certificate is issued. All Windows servers are automatically PKCS7 encoding format, all other PKCS12.
- For the **SHA Fingerprint Version**, choose between:
- SHA-256 Cert + Root: The current default. Returns a certificate chain in the SHA2 algorithm.
- SHA-256 Cert + SHA-1 Root: Returns a SHA2 certificate with the older SHA1 root certificate of the CA.
Certificates are only issued in the SHA-256 algorithm. The selection here allows you to choose between SHA-1 and SHA-2 root certificate issuance. The current standard is the complete SHA-2 chain (SHA-256 Cert + Root). The root certificate in SHA-1 is only recommended for old devices before 01/08/2013.
- Certificate Transparency is enabled by default.
What is 'Certificate Transparency'? With the 'Certificate Transparency' procedure, certificates issued by mistake or maliciously are to be better recognized for a domain. The digital certificates issued by a 'Certificate Authority' for encrypted Internet connections are checked and logged per default in a revision-proof logbook.
#### In the **CSR Key** section
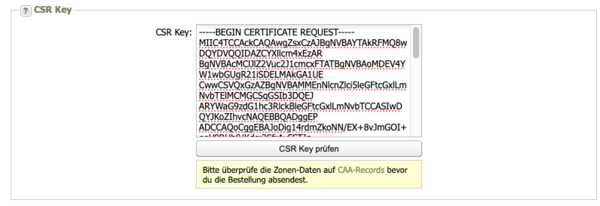 - Insert the pre-created [CSR key](/en/tls-ssl-smime/csr/) in the **CSR Key** field.
Note that when copying the CSR key, mark the first line "-----BEGIN CERTIFICATE REQUEST-----" and the last line "-----END CERTIFICATE REQUEST-----" including the lines.
You can use a DigiCert tool to check the correctness of the CSR key beforehand [https://ssltools.digicert.com/checker/views/csrCheck.jsp](https://ssltools.digicert.com/checker/views/csrCheck.jsp)
- Click the **Check CSR Key** button.
#### In the **Certificate Details** section
- The Common Name (certificate name) from the CSR key is displayed in the **Name** field. The following form field "Additional Domains" is only required for [ordering multidomain certificates](/en/tls-ssl-smime/order-multidomain-certificates/).
#### In the **Contact** section
- Select the contacts:
- Administrative Contact = Applicant (must be identical to the details in the CSR key)
- Technical Contact = Reseller/Provider
You can also create new contacts here by clicking on the + icon. Sometimes, however, the contact is already predefined and cannot be changed by you.
- Insert the pre-created [CSR key](/en/tls-ssl-smime/csr/) in the **CSR Key** field.
Note that when copying the CSR key, mark the first line "-----BEGIN CERTIFICATE REQUEST-----" and the last line "-----END CERTIFICATE REQUEST-----" including the lines.
You can use a DigiCert tool to check the correctness of the CSR key beforehand [https://ssltools.digicert.com/checker/views/csrCheck.jsp](https://ssltools.digicert.com/checker/views/csrCheck.jsp)
- Click the **Check CSR Key** button.
#### In the **Certificate Details** section
- The Common Name (certificate name) from the CSR key is displayed in the **Name** field. The following form field "Additional Domains" is only required for [ordering multidomain certificates](/en/tls-ssl-smime/order-multidomain-certificates/).
#### In the **Contact** section
- Select the contacts:
- Administrative Contact = Applicant (must be identical to the details in the CSR key)
- Technical Contact = Reseller/Provider
You can also create new contacts here by clicking on the + icon. Sometimes, however, the contact is already predefined and cannot be changed by you.
 #### In the **Authentication Settings** section:
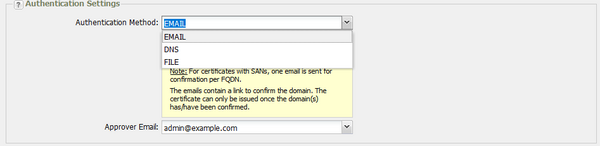
- Select the desired authentication method in the **Authentication Settings** area.
Follow the instructions that appear in the yellow box after you select the authentication method.
#### In the **Authentication Settings** section:
- Select the desired authentication method in the **Authentication Settings** area.
Follow the instructions that appear in the yellow box after you select the authentication method.
 ##### EMAIL method
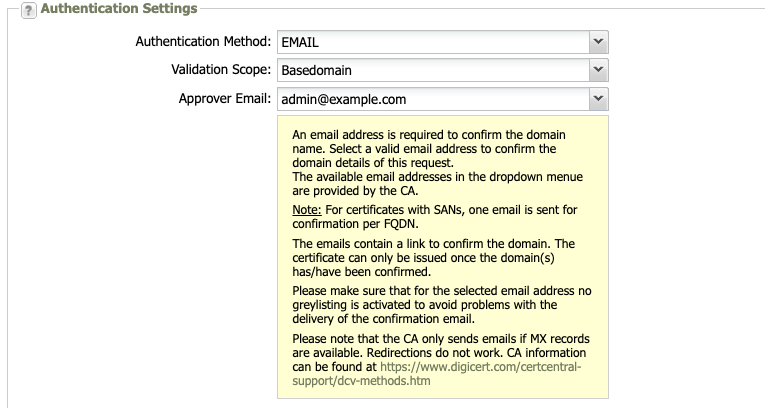
- An email will be sent to the confirmation email address selected here.
- Select the email address in the **Approver Email** field.
- Click on the confirmation link in the email.
- This confirms the domain ownership. (MX-Record must be created for this).
##### EMAIL method
- An email will be sent to the confirmation email address selected here.
- Select the email address in the **Approver Email** field.
- Click on the confirmation link in the email.
- This confirms the domain ownership. (MX-Record must be created for this).
 ##### FILE method
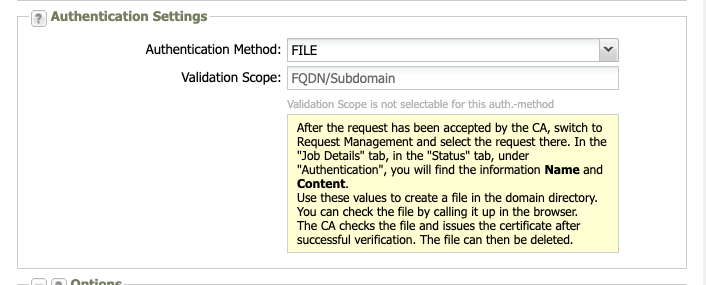 - Create a file with the data generated by the system
- Store it on the web server.
FILE Name: [example.com/.well-known/pki-validation/fileauth.tx](http://example.com/.well-known/pki-validation/fileauth.tx)t
File Content : 2018112007555401i23owspz4su5ry9q31j6rlhw89e4wwd2tz8jt9a0rpl36u1n
#### DNS method
- Create a file with the data generated by the system
- Store it on the web server.
FILE Name: [example.com/.well-known/pki-validation/fileauth.tx](http://example.com/.well-known/pki-validation/fileauth.tx)t
File Content : 2018112007555401i23owspz4su5ry9q31j6rlhw89e4wwd2tz8jt9a0rpl36u1n
#### DNS method
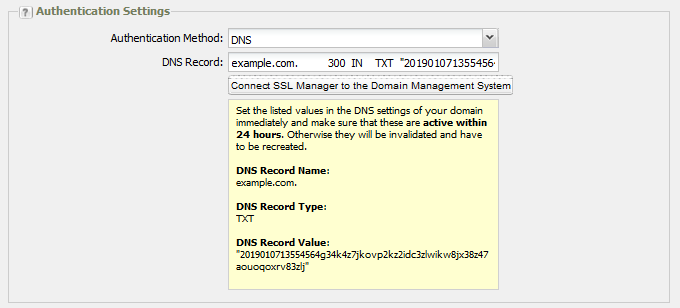 - Enter the DNS record generated by the system in the zone.
- Confirm the GDPR notice.
- Click “Apply” to start the ordering process.
For example, this method is used by default for the free Basic SSL certificate.
## Step 3: Tracking the order
In the [Order History](/en/tls-ssl-smime/tracking-certificate-orders/) you can track all current and completed orders.
- Enter the DNS record generated by the system in the zone.
- Confirm the GDPR notice.
- Click “Apply” to start the ordering process.
For example, this method is used by default for the free Basic SSL certificate.
## Step 3: Tracking the order
In the [Order History](/en/tls-ssl-smime/tracking-certificate-orders/) you can track all current and completed orders.