Suche in diesem Bereich

InterNetX SSL For WHMCS is a plugin which allows you to offer SSL certificates provided by InterNetX SSL Manager.
Table of contents of this page
Features:
Admin Area:
- Create Certificate
- Renew Certificate
- Delete Certificate
- Resend Configuration Email
- Resend Approval Email
- View SSL Configuration Status
- Resend Approval Email
- View SSL Configuration Status
- Multi-Language Support
Client Area Features:
- Prepare Certificate Creation Request
- View Certificate Details
- View Administrative & Technical Contacts
Compatibility:
Supports WHMCS V7 and later
Certificates provided by InterNetX
|
|
| 
|


Installation and Configuration
In this section we will show you how to properly install and configure your InterNetX SSL for WHMCS. For general information see WHMCS Documentation Home: http://docs.whmcs.com/Main_Page
1. Order the WHMCS Domain Plugin at "Optional Services" in the AutoDNS customer center. An appendix for the SSL Manager contract is needed before sending you the plugin by email.
2. Upload plugin files to your server into your root WHMCS directory.
3. Now, you have to set up your product in the Admin Area. Go to the Setup > Products/Services > Products/Services and create a new group for SSL through pressing "Create a New Group".
4. Afterwards, fill "Product Group Name" field and press "Save Changes".
5. Next step is creating your products. To do so, go to Products/Services and press "Create a New Product".
6. Now choose previously created Product Group, type your "Product Name" and press "Continue".
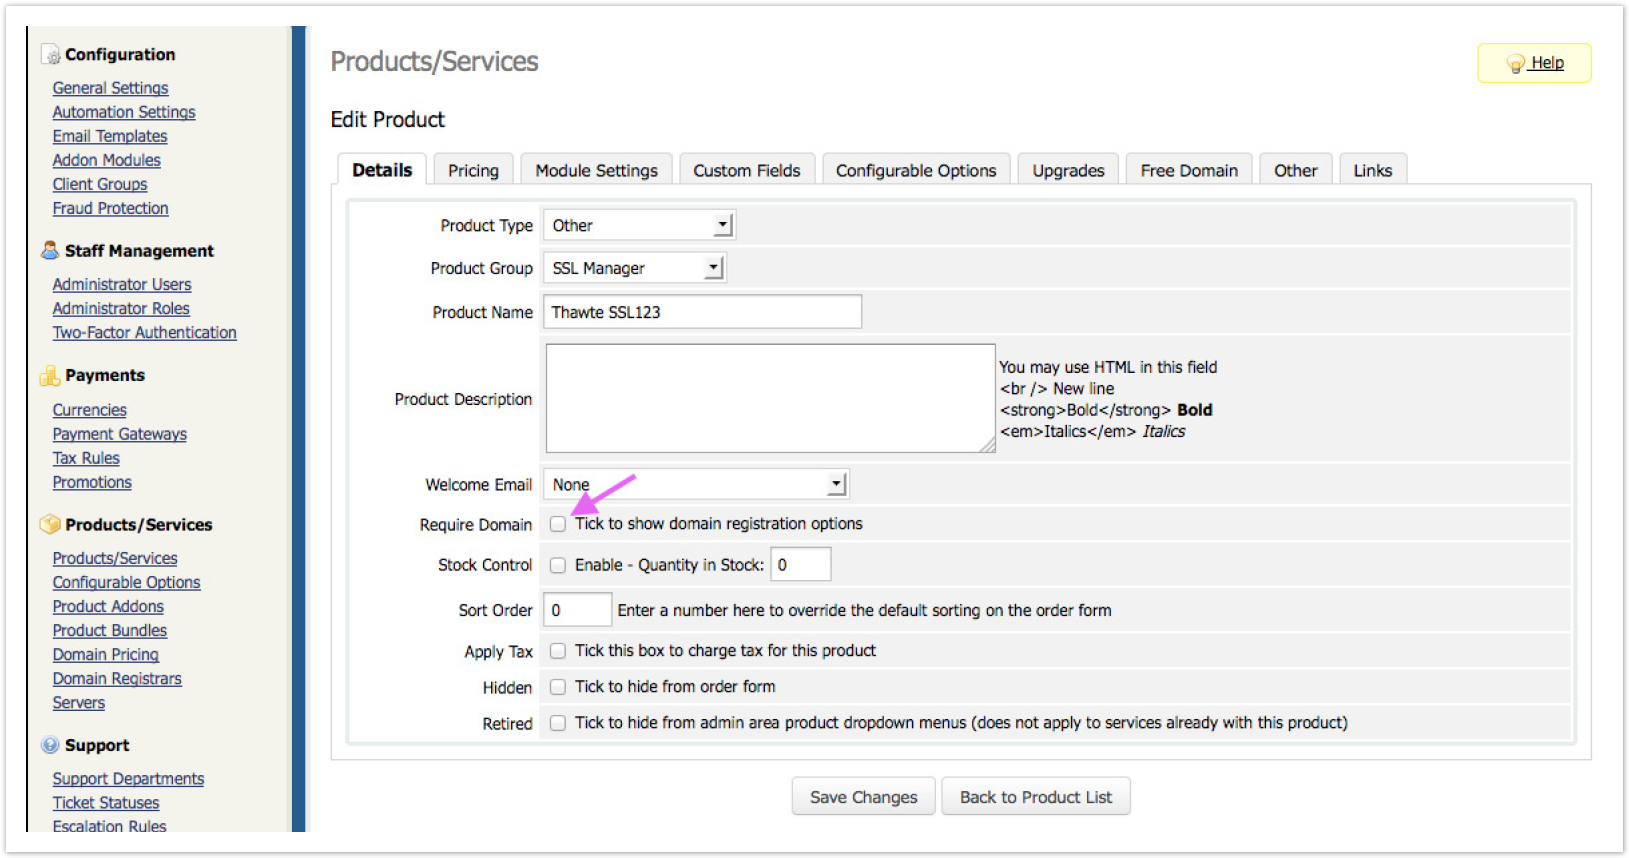
7. At the Details tab deselect "Require Domain". The domain field will be created later.
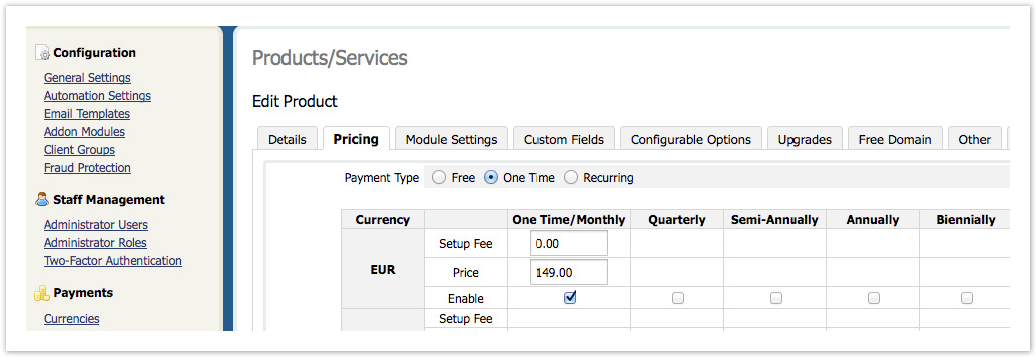
8. At the “Pricing" tab select “One Time”, enter your prices and check “Enable”:
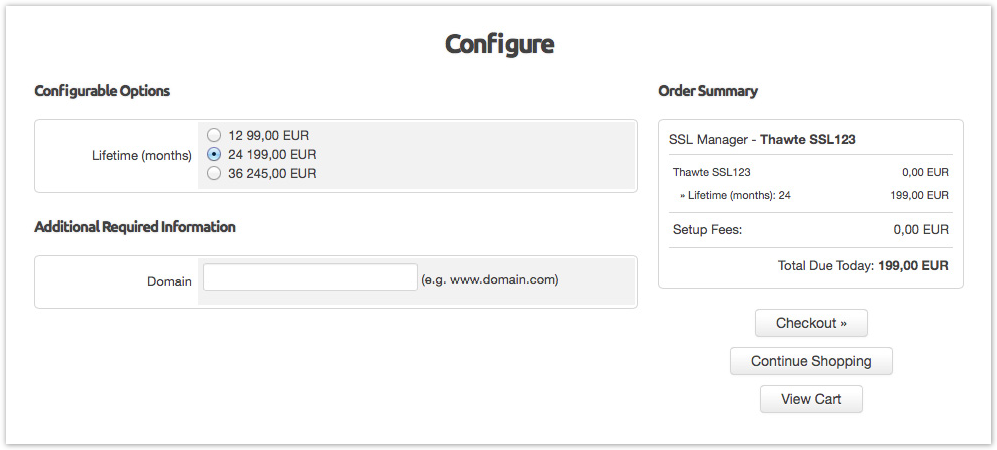
In addition you can use “Configurable Options” to let the client select the lifetime and the respective price. For the client it looks like this:
→ To use “Configurable Options” create a “New Group” by selecting Setup > Product/Services > Configurable Options and click "Create a New Group“.
→ Select an assigned certificate and click "Save Changes".
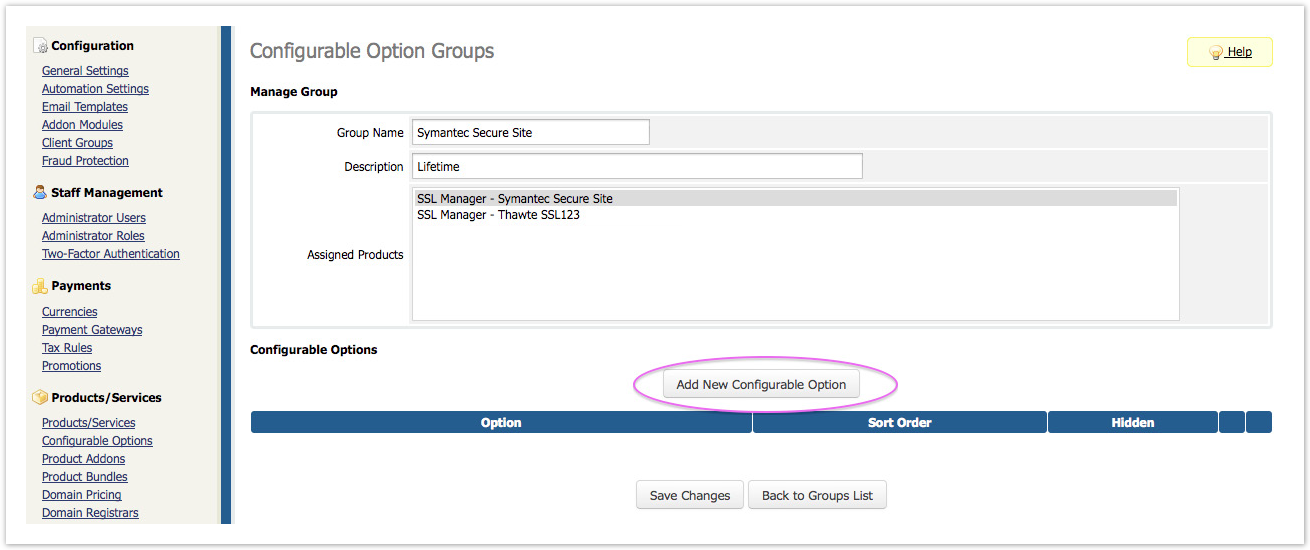
→ Then click "Add New Configurable Option“
→ This will open a new window with the "Configurable Options“.
→ Enter the "Option Name" "lifetime|Lifetime (months)“ and select the "Option Type" radio.
→ Add an "Option" e.g. "12" for 12 months. Repeat this step for e.g. "24" and "36" months.
→ Define prices for the assigned certificate and click "Save Changes":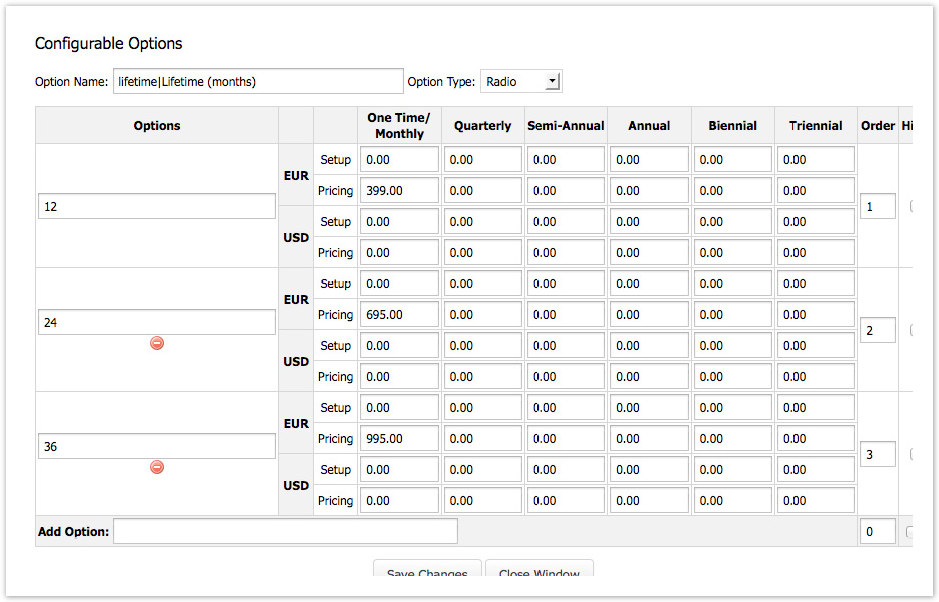
Repeat tehse steps for each certificate and its pricing/lifetime.
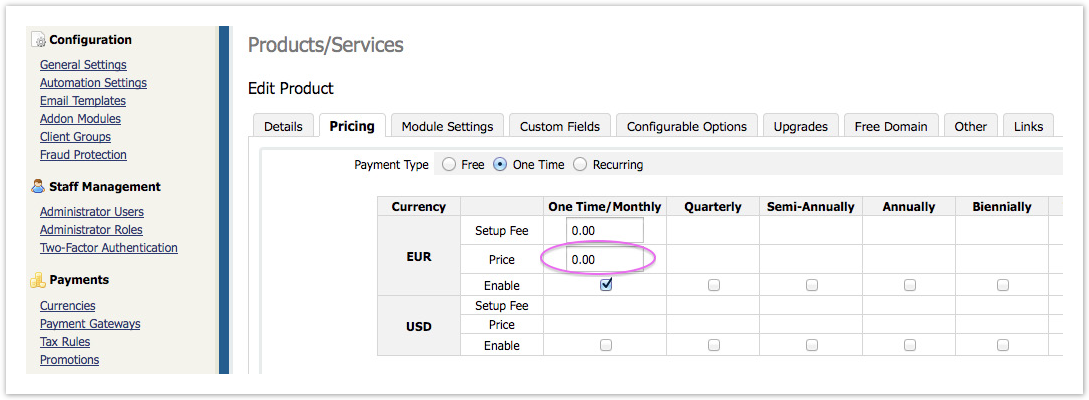
Important Note:
If you switched from standard pricing to “Configurable Option Pricing”, you need to set the product pricing back to zero to avoid doubled prices!
Overview
Content Tools