

- Home
- Integrations
- SetupGuide WHMCS Domain Plugin
SetupGuide WHMCS Domain Plugin

InterNetX domain plugin for WHMCS is a registrar module which allows you to offer InterNetX domains to your customers. It also allows complex management of ordered domains from both client area and admin area.
Features and compatibility
Admin area features
- Register Domain
- Transfer Domain IN
- Renew Domain
- Manage Contact Details
- Get EPP Authinfo Code
- Delete Domain
- Transfer Domain OUT (ACK/NACK)
- Domain Addon Management
- Premium Domain TIER Management
- Synchronization Of Expired/Transferred Domains
- Synchronization Of Expiry Dates
- Whois Provider Management using WhoisProxy Service
Client area features
- Renew Domain
- Enable Autorenew
- Get/Modify Name Servers
- Enable ID Protection (Whois Privacy Service)
- Manage Contacts Details
- DNS Management
- Email Forwarding
- Domain Forwarding
- Get EPP Authinfo Code
- Change Owner
Compatibility
Supports WHMCS V8 and later
Known limitations
- Automated .CA Registration not working (manual processing via AutoDNS Frontend is possible after the WHMCS order arrived)
- Automated .HK Registration not working (manual processing via AutoDNS Frontend is possible after the WHMCS order arrived)
Installation and configuration - JSON API plugin (PHP 8.1)
Please refer to INSTALL.md and/or UPGRADE.md within the supplied .ZIP-file. All necessary steps are described in detail there.
- After setup you have to configure your contact details.
At the Setup → General Settings → Domains uncheck Use Clients Details checkbox, fill contact details and press Save Changes. - In order to proceed, go to the Setup → Product/Services → Domain Registrars, find InterNetX and press Activate next to it.
- Now, enter your API access details, API URL and default name servers.
- The regular API URL is: https://api.autodns.com/v1
- The default name servers for AutoDNS are: a/b/c/d.ns14.net
- If you are using virtual name servers from InterNetX please update /modules/registrars/InterNetX/app/Helpers/Config.php and change the ns14.net entries to your own virtual name server domain.
Installation and configuration - XML API plugin (PHP 7.4)
In this section we will show you how to properly install and configure your InterNetX Domain Plugin for WHMCS.
- Download the WHMCS Domain Plugin in the WHMCS Marketplace or here on our Help Center page.
- Unpack the zip-file and upload the files to your server into your root WHMCS directory.
- Duplicate dist.additionalfields.php file located at the
/resources/domains/directory toadditionalfields.phpand add code below at the end of the file. This will add domain extensions for the domain plugin and will overwrite some of the standard WHMCS extensions that are not required.
/**
* InterNetX REGISTRAR ADDITIONAL PARAMETERS
* This file will load proper additional parameters for InterNetX registrar domain module
*/
$filename = ROOTDIR . DIRECTORY_SEPARATOR . ‘resources’ . DIRECTORY_SEPARATOR . ‘domains’ . DIRECTORY_SEPARATOR .’InterNetX_additionaldomainfields.php’;
if (file_exists($filename)) {
include($filename);
} else {
die(‘Can not load InterNetX_additionaldomainfields.php File error: resources/domains/dist.additionalfields.php’);
}
- Now, you have to set up your contact details.
At the Setup → General Settings → Domains. Uncheck Use Clients Details checkbox, fill contact details and press Save Changes. - In order to proceed, go to the Setup → Product/Services → Domain Registrars, find InterNetX and press Activate next to it.
- Now, enter your API access details, API URL and default name servers.
- The regular API URL is: https://gateway.autodns.com/
- The default name servers for AutoDNS are: a/b/c/d.ns14.net
- If you are using virtual name servers from InterNetX please update
/modules/registars/InterNetX/classes/class.InternetX\_API.phpand change the ns14.net entries to your own virtual name server domain.
- Add additional registrar settings:
- Context: The default context for AutoDNS is 4. If you are using Personal AutoDNS please use your exclusive URL and the PersonalAutoDNS ID you have received.
- Reply To: Defines where the replies of the AutoDNS orders will be sent by email. These emails are required to track orders with errors. You can select from the email addresses of your administrator accounts.
- MX Record: Here you can set the default subdomain name for the MX Record. The MX will point to the same IP that is set in “IP Address”. We suggest to use the name webmail.
- IP Address: The IP address where the DNS Records that are created during domain registration will point. The IP also defines the MX Record subdomain name supplied above.
- Auto Delete: Do not activate this option unless you are using Prepayment/AutoDelete with InterNetX! Else the feature will result in double renewals and costs for domains!
- Admin Contact: The OwnerC will also be AdminC in the public Whois. Else the Client will only be Owner.
- Test Mode: To use the AutoDNS Demo System activate Test Mode.
If you need access to the AutoDNS Demo System please contact sales@internetx.com. The sandbox name servers are ns1/ns2.demo.autodns.com
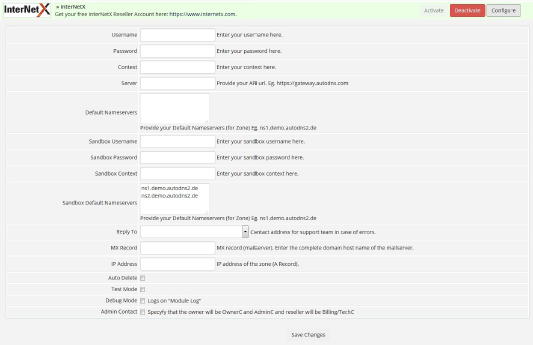
- Press the Save Changes button to finish the initial installation and configuration of the module.
Management
TLD management
Your clients will be able to order domains as soon as you set up TLDS for your desired extensions.
- To start stetting up your TLDs go to the Setup → Products/Services → Domain Pricing.
- Fill TLD, choose additional features like DNS Management and select InterNetX from Auto Registration dropdown menu if you wish a fully automated registration of your client’s orders.
Press Save Changes to add this TLD to your system.
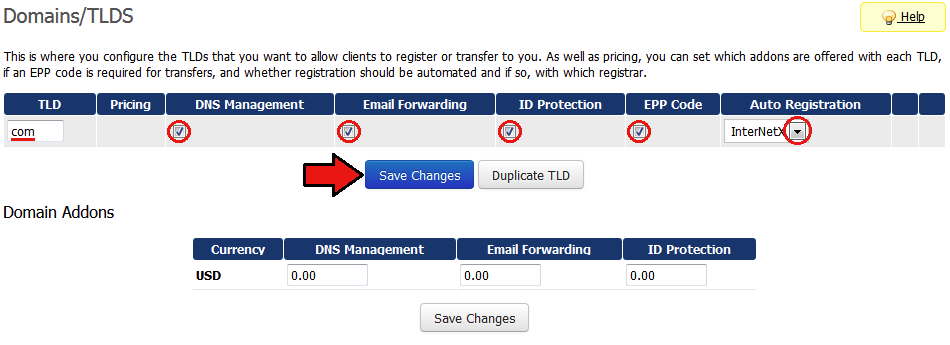
- To set up pricing press Open Pricing in Pricing column.
New window will open, please make sure your browser does not block PopUps.
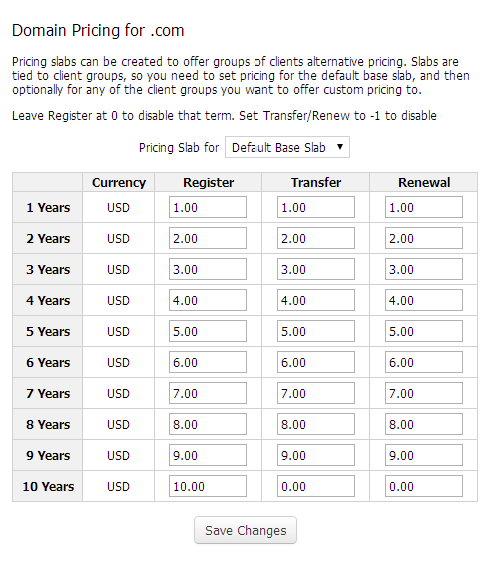
- Here you can set up pricing for registering, transferring and renewing domains using created TLD.
- Press Save Changes to finish.
- Setup of AutoDNS user profile: In addition you have to set up your AutoDNS User Profile with additional information once.
- Go to User Management → User Configuration → User Profile
The tabs IRTP, Verification and TMCH should show the Reseller’s Company Name and Support email address.
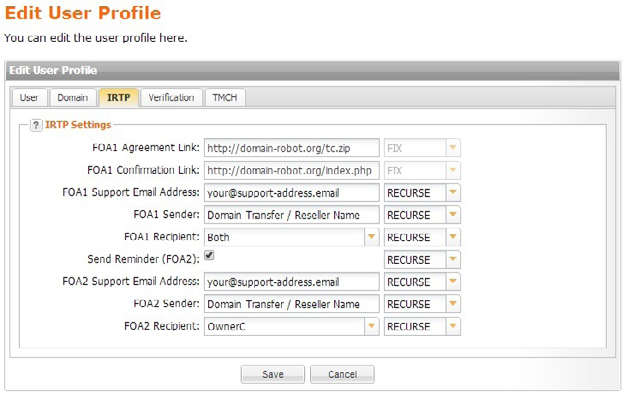
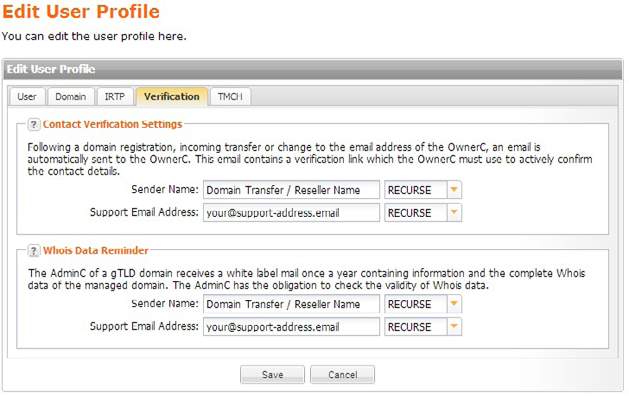
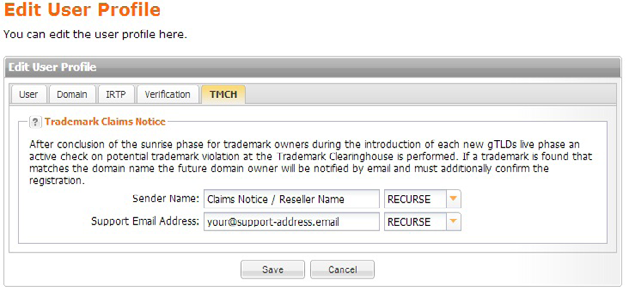
After configuring the TLD and the AutoDNS user profile you can start ordering the first domain.
- Go to client area and choose Domains → Register a New Domain.
Admin area
The InterNetX Domain Plugin for WHMCS allows you to perform various actions on your client’s domains.
In addition to basic actions (Register, Transfer, Renew and Modify Contact Details) you are able to carry out functions such as Get EPP Authinfo Code, Request Delete, Transfer OUT ACK and Transfer Out NACK.
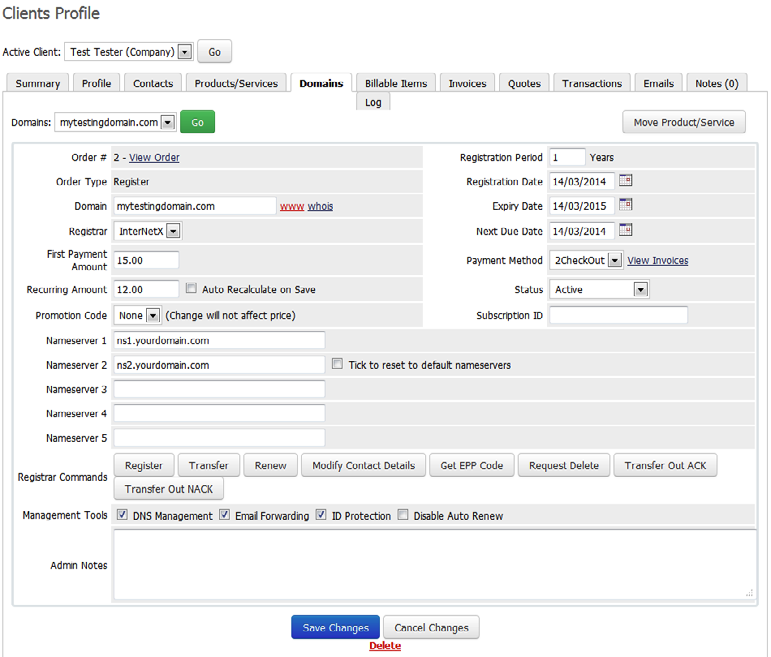
If you want to do a manual synchronization of your domains and their expiry/due dates you can start the Cron Sync manually:
http://your-whmcs-domain.tld/whmcs/crons/domainsync.php
Client area
Your clients can manage all relevant aspects of their domain. On the domain’s details page your client can view basic details of his domain and order its renewal.
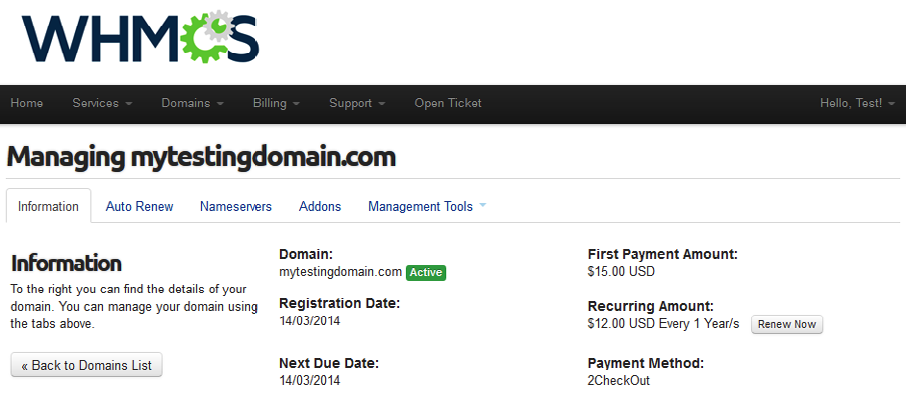
AutoRenew
In the Auto Renew tab the Auto Renew functionality can be enabledd and disabled.
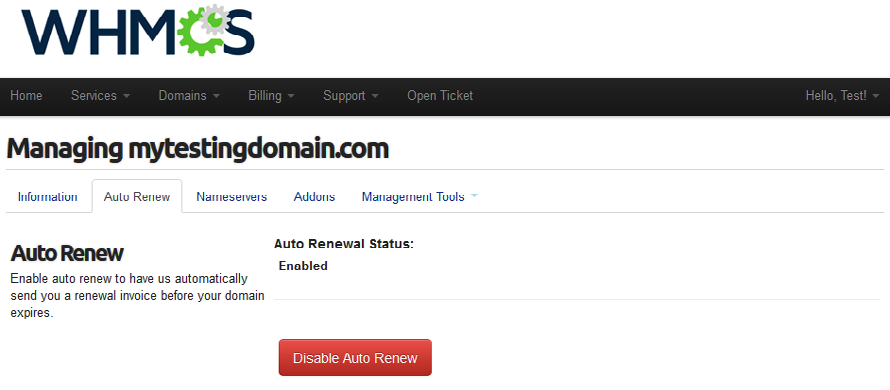
Disabling Auto Renew will result in an automated deletion of the domain on the expiration date! If you reactivate Auto Renew the delete order will be removed again.
Nameservers
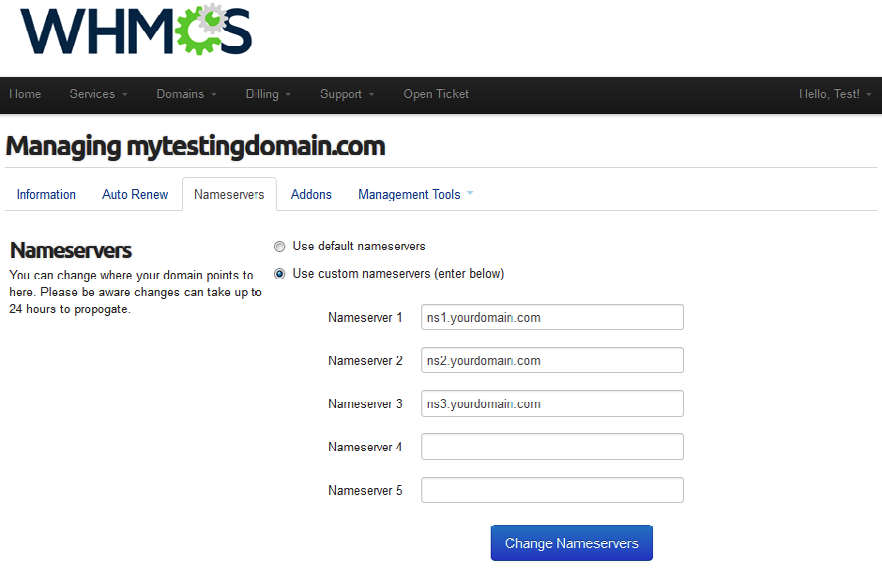
The domain’s name servers, this can be changed in the Nameservers tab.
Addons
In the Addons tab you can manage addons ordered along with a domain.
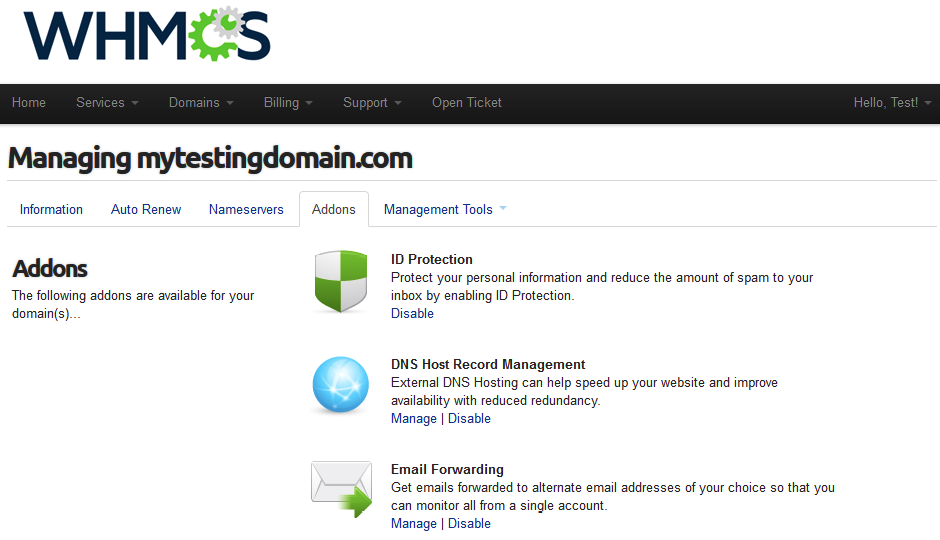
- ID Protection allows you to activate and deactivate the Whois Privacy Service.
- DNS Host Record Management allows you to manage the DNS Entries for the domain.
- Email Forwarding allows you to redirect email addresses to other external email addresses.
Contact information
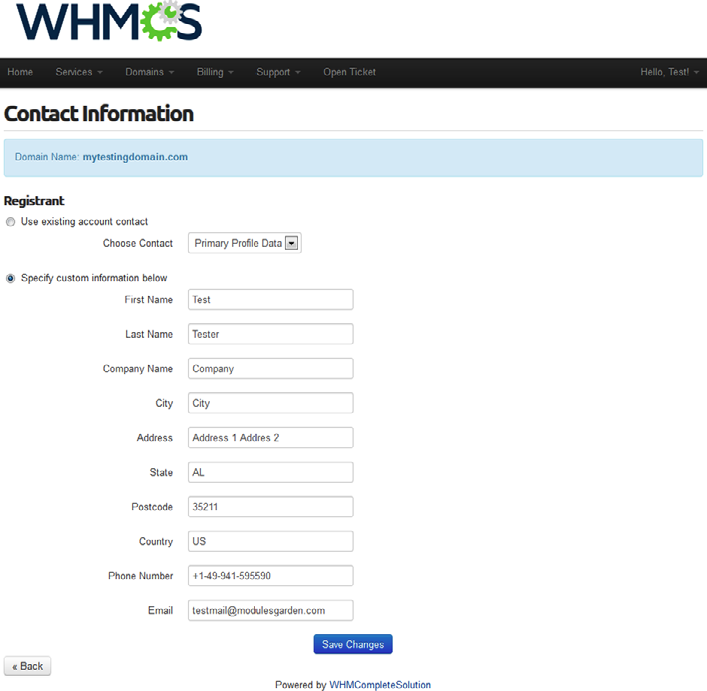
The InterNetX Domain Plugin for WHMCS also allows you to modify the whois contact details. The only limitation here is you cannot change the first and last name.
Email forwarding
InterNetX allows to set up email forwarding if you have ordered the InterNetX Redirector service. Please contact sales@internetx.com to get the Redirector service activated.
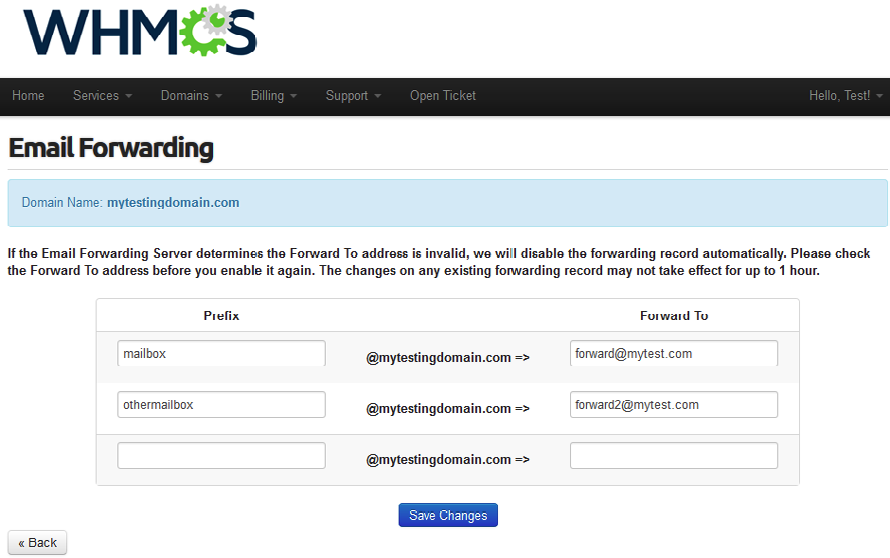
To activate email forwarding the MX record of the domain must be set to a hostname that points to IP address 62.116.130.8 in the DNS entry!
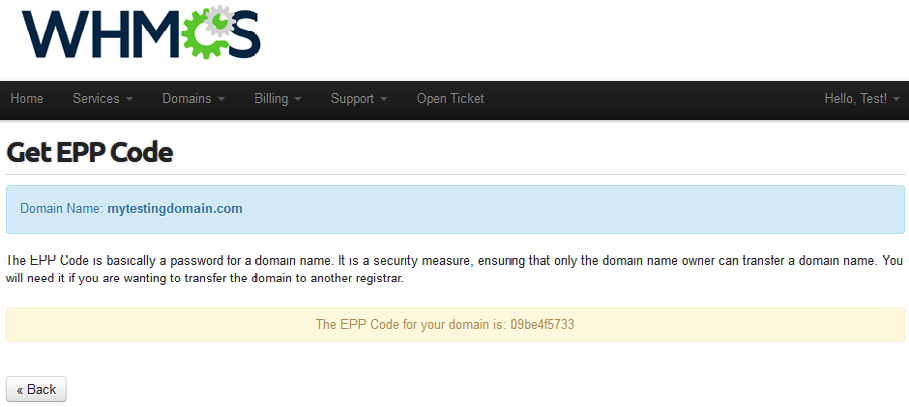
EPP authinfo code
You can easily receive your domain’s EPP Authinfo Code, simply go to the Management Tool → Get EPP Code.
Domain forwarding
InterNetX allows to set up domain forwarding if you have ordered the InterNetX Redirector service. Please contact sales@internetx.com to get the Redirector service activated.
Go to → Manage Domain Forwarding → Management Tools
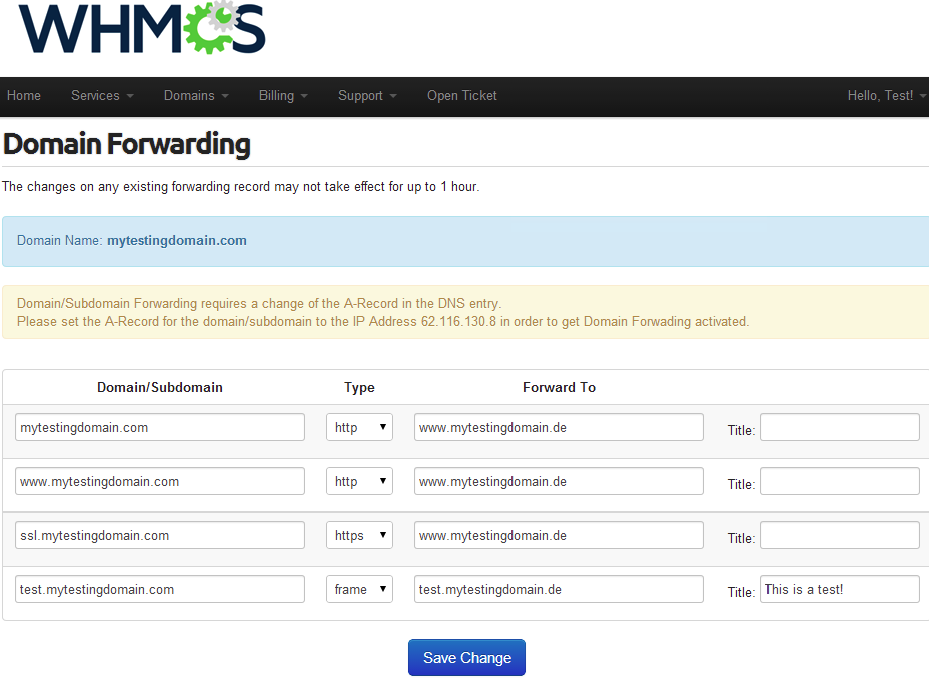
The Domain/Subdomain Forwarding requires a change of the A-Record in the DNS entry. Please set the A-Record for the domain/subdomain to the IP Address 62.116.130.8 in order to get Domain Forwarding activated.
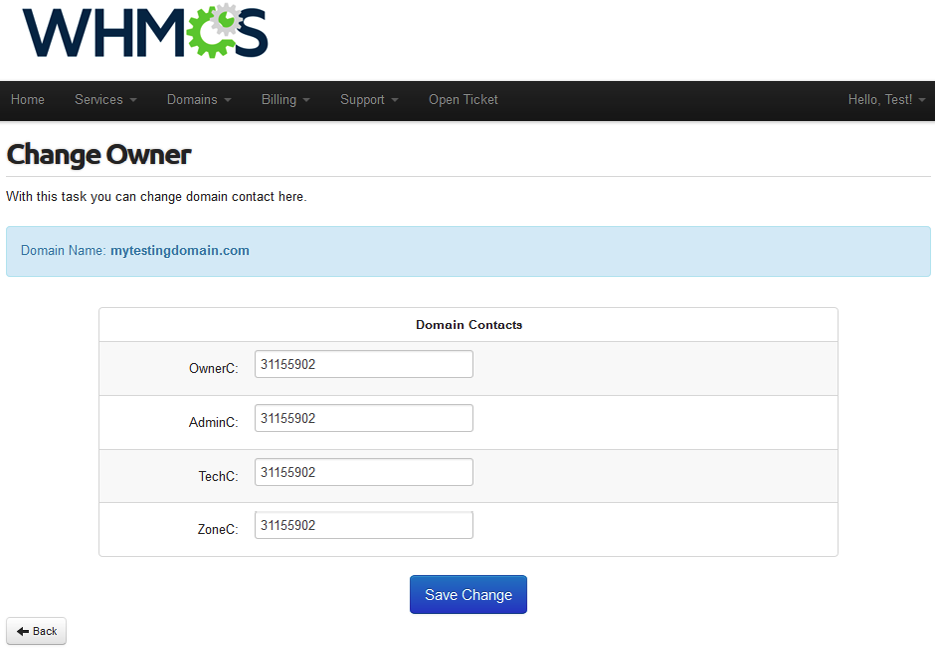
Owner change
You can also change the domain owner.
WhoisProxy
The InterNetX WhoisProxy acts as a singular intermediary which accesses the various whois servers of the registries, thereby saving users the effort of sending whois queries to every whois server.
WhoisProxy integration into WHMCS
How to change the Whois Server in WHMCS:
http://docs.whmcs.com/WHOIS_Servers
Example TLD List
The list of available TLDs will change from time to time especially with new gTLDs being introduced nearly every week!
The whois server list is located at: /resources/domains/whois.json
You can edit the whois file according to your needs and overwrite the regular WHMCS whois configuration per TLD.
Example list of TLDs and Whois servers:
[
{
“extensions”: “.com,.net,.org,.de,.cat,.ca,.travel”,
“uri”: “socket://whois.autodns3.de”,
“available”: “free”
},
{
“extensions”: “.bike”,
“uri”: “socket://whois.autodns3.de”,
“available”: “free”
},
{
“extensions”: “.at”,
“uri”: “socket://whois.autodns3.de”,
“available”: “free”
}
]
A complete list of all available WhoisProxy TLDs can be retrieved using the following command:
whois -h whois.autodns3.de tld
Premium domains
The Premium Domains module adds premium domain functionality inside the existing InterNetX WHMCS Domain Registrar module.
The premium domain feature requires using the WhoisProxy! To use the premium domain function our WhoisProxy is mandatory.
If the lookup provider is changed, all Whois Queries including non premium Domains, will be executed via the WhoisProxy.
Please contact our Sales Team (sales@internetx.com) to receive access to the WhoisProxy.
Installation
- Go to Admin Area of your WHMCS.
- Go to Setup → Addon Modules and activate InterNetX Premium Domains Addon. There is no need to configure the addon, just click Activate”button.
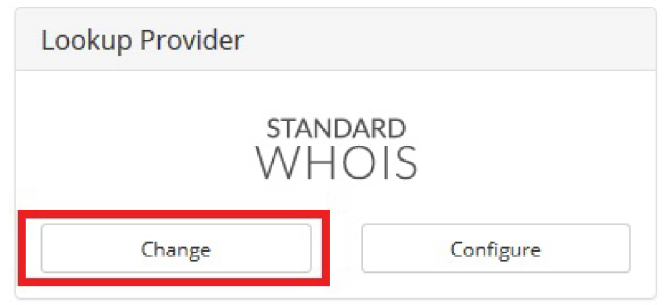
- Go to Setup → Products/Services → Domain Pricing, and change your Lookup Provider to InterNetX by clicking on Change button in the Lookup Provider section.
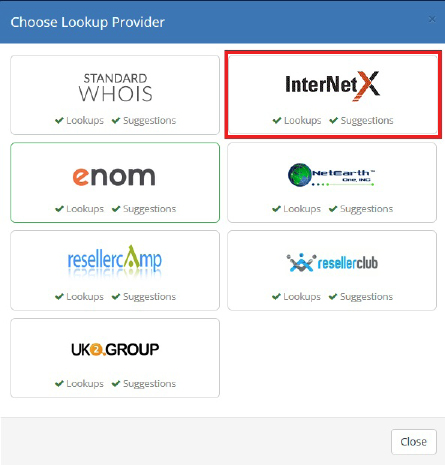
- Then select InterNetX from all lookup providers list.
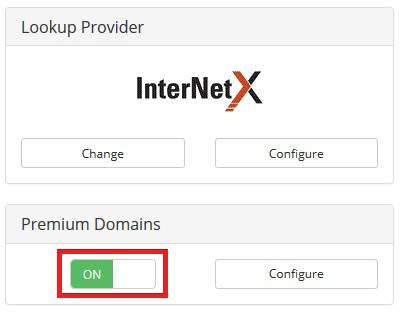
- Make sure that the premium domain button is set to ON.
Configuring
The Premium Domains module allows the user to set his own price for each premium domain class.
- Click Configure button in the premium domains section.
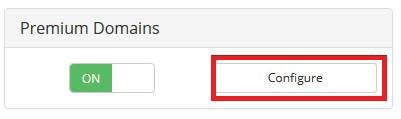
The module will change the Configure Premium Domains Levels window to allow the user to enter and save their premium domains classes. - Enter premium domain class names inside text fields and save them into database by clicking Save button.
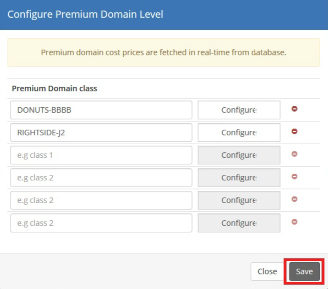
- After adding a premium domain class to the database, the user has the possibility to configure its pricing by clicking on the “Configure” button.
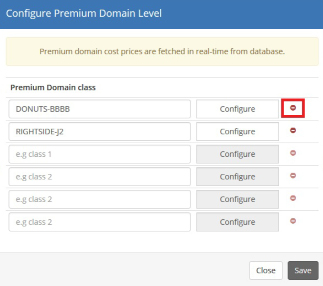
- Premium domain classes can also be deleted from the database by clicking on “Delete” button.
- In the Configure Premium Domain Pricing window the Register, Transfer, and Renewal prices for selected price class can be set and save by clicking the Save button.
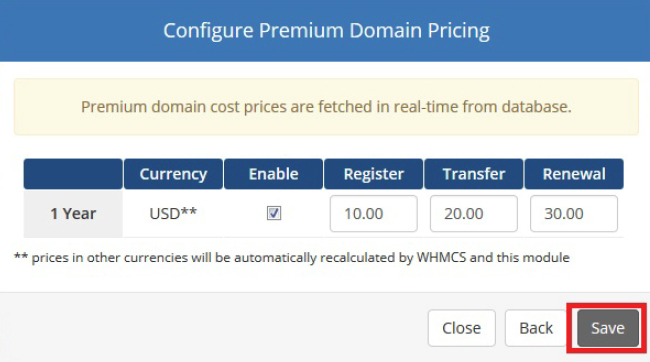
From now on if a premium domain will be detected by the WHMCS Domain Registrar the price will be taken from the database and set in the Client Area during the domain registration process.
In Configure Premium Domain Pricing the user can only configure pricing for a one year period, because WHMCS does not allow users to register premium domains for longer than one year. In this same window only one currency is available because WHMCS and the Premium Domains module automatically recalculates prices to other currencies based on the current currency rate. When a user wants to disable register/renew/transfer prices of domain just type “0” (zero) in the appropriate premium domain pricing field.
Renew prices
When you are in the Client Area and go to Domains → My Domains and click Renew button on the left, the action bar displaying the renew prices of premium domains will not change. WHMCS does not support changing prices in this place.
Additional information about custom client area forms and custom localisation
Custom forms in client area
- Email Forwarding → /modules/registrars/InterNetX/domainForwarding.tpl
- Domain Redirect → /modules/registrars/InterNetX/domainForwarding.tpl
- Owner Change → /modules/registrars/InterNetX/changeOwner.tpl
Changes to design and localization can be done here, but localization should be done by using language tags.
Custom localization via language tags
You will find language tags all over WHMCS. We are using separated “internetx” language tags to make it visible who made the localization.
$LANG.internetxchangeowner
$LANG.internetxchangeownerdesc
$LANG.clientareasavechanges
$LANG.clientareacancel
Language tags beginning with “$LANG.internetx” are located in:
/lang/overrides/german.php
/lang/overrides/english.php
These individual language tags can be changed as needed.
Other language tags like “$LANG.clientareacancel” without the “internetx” are WHMCS language tags. They can also be overwritten by inserting $LANG.clientareacancel in /lang/overrides/xxxxx.php
E.g. if you do not like the button Cancel in your Client Area forms, because the button does not cancel but does undo, you simply can override $LANG.clientareacancel from Cancel to Undo Changes in /lang/overrides/english.php
Localization of domain extensions
Some TLDs require additional data, e.g. a VAT number or a passport number.
These extensions are managed in a separate file and are not translated on purpose:
/resources/domains/InterNetX_additionaldomainfields.php
If you want to translate these extension names you can either create own language tags or change it directly in InterNetX_additionaldomainfields.php if you are only offering one single language for your customers.
e.g.
$additionaldomainfields[“.ru”][] = array(“Name” => “ID Card Number”…
After the initial ” array(“Name” => ” is the lozalisation, you can change ID Card Number to ID Number as you like it.
Was this article helpful?
Thanks for the feedback.