

- Home
- Integrations
- SetupGuide WHMCS SSL plugin
SetupGuide WHMCS SSL plugin

InterNetX SSL For WHMCS is a plugin which allows you to offer TLS/SSL certificates provided by InterNetX SSL Manager.
Features and compatibility
Admin area
- Create certificate
- Renew certificate
- Delete certificate
Client area
- Prepare certificate creation request
- View certificate details
- View administrative & technical contacts
Compatibility
Supports WHMCS V7 and later
Certificates provided by InterNetX
Geo Trust Basic SSL
Installation and configuration
In this section we will show you how to properly install and configure your InterNetX SSL for WHMCS. For general information see WHMCS documentation home: http://docs.whmcs.com/Main_Page
- Upload plugin files to your server into your root WHMCS directory.
- Set up your product in the Admin Area.
Go to the Setup → Products/Services → Products/Services and create a new group for TLS/SSL through pressing Create a New Group. - Afterwards, fill Product Group Name field and press Save Changes.
- The next step is to create your products. To do so, go to Products/Services and press Create a New Product.
- Now choose previously created Product Group, type your Product Name and press Continue.
- At the Details tab deselect Require Domain. The Domain field will be created later.
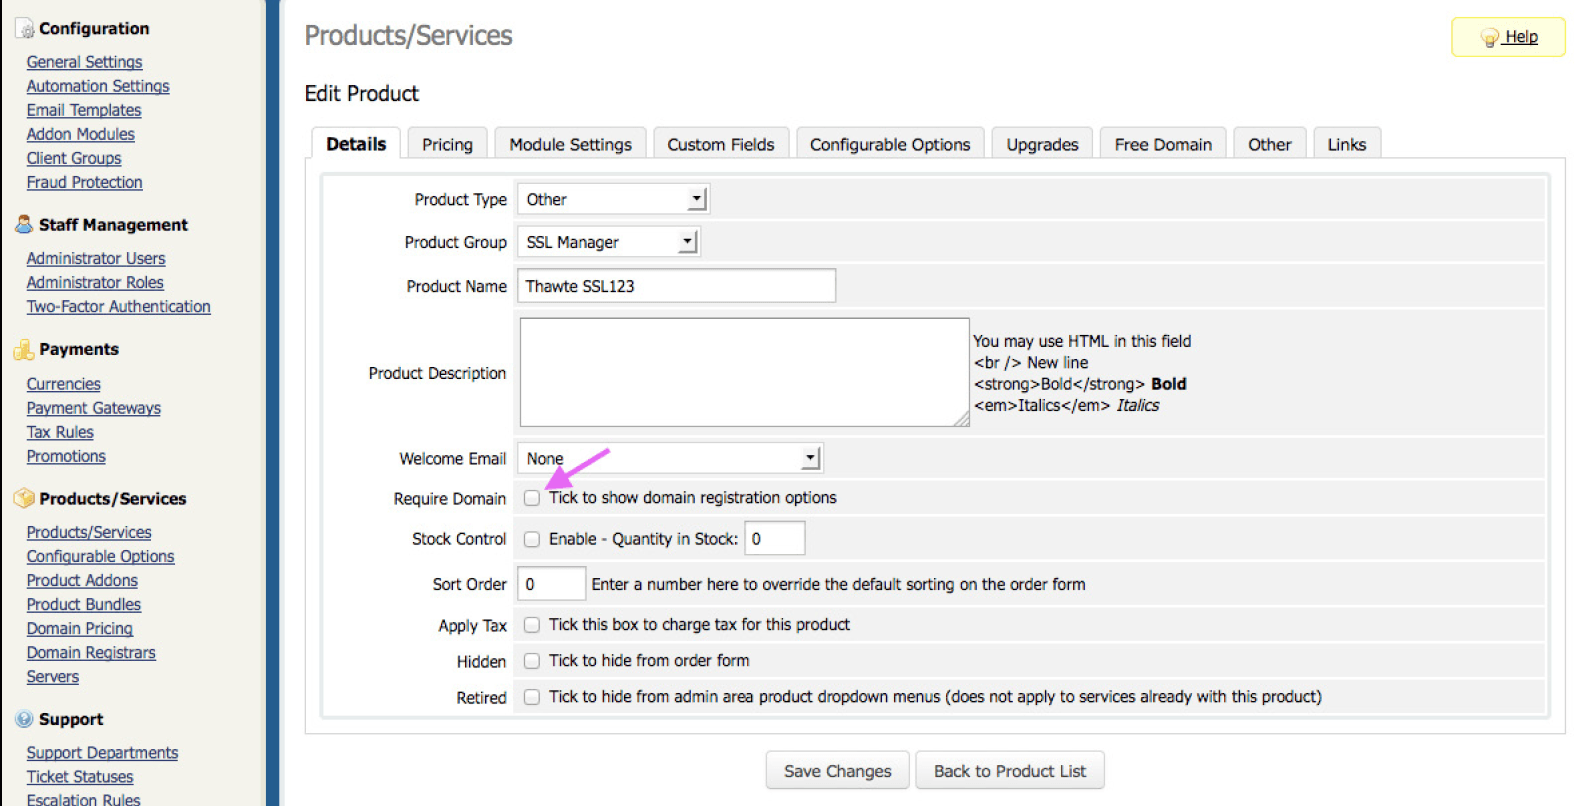
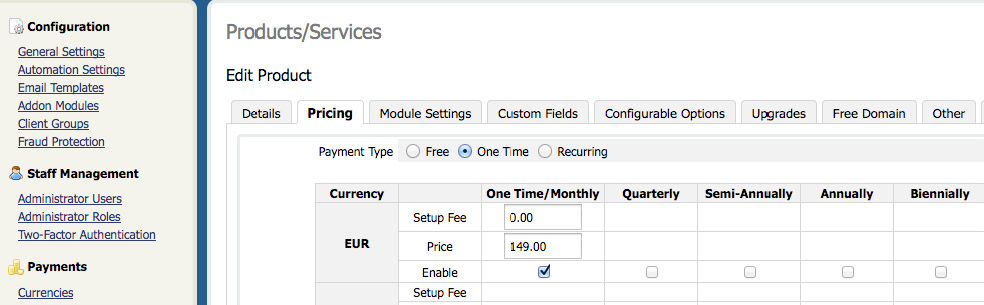
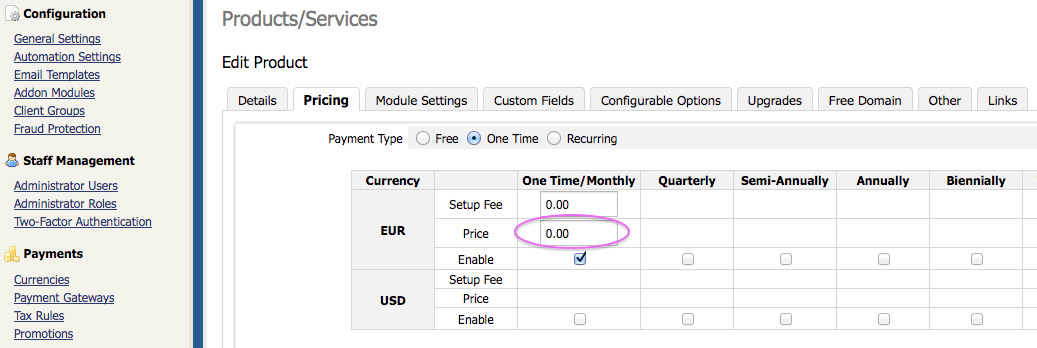
- In the Pricing tab select One Time or Recurring according to your needs, enter your prices and check Enable.
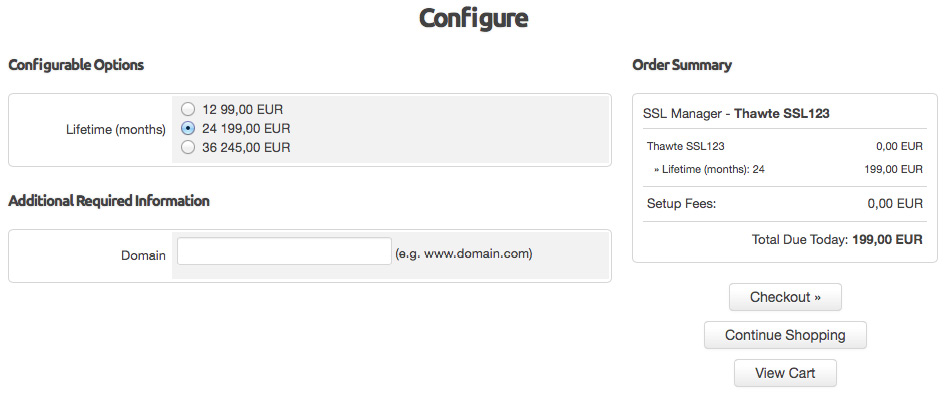
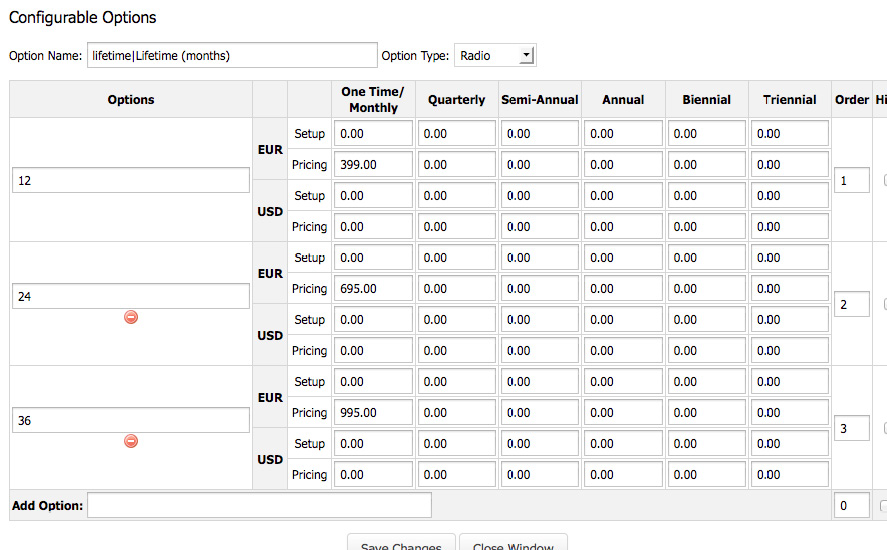
- In addition you can use Configurable Options to let the client select the lifetime and the respective price. For the client it looks like this:
- To enable the Configurable Options, create a New Group by selecting Setup → Product/Services → Configurable Options and clicking Create a New Group.
- Select an assigned certificate and click Save Changes.
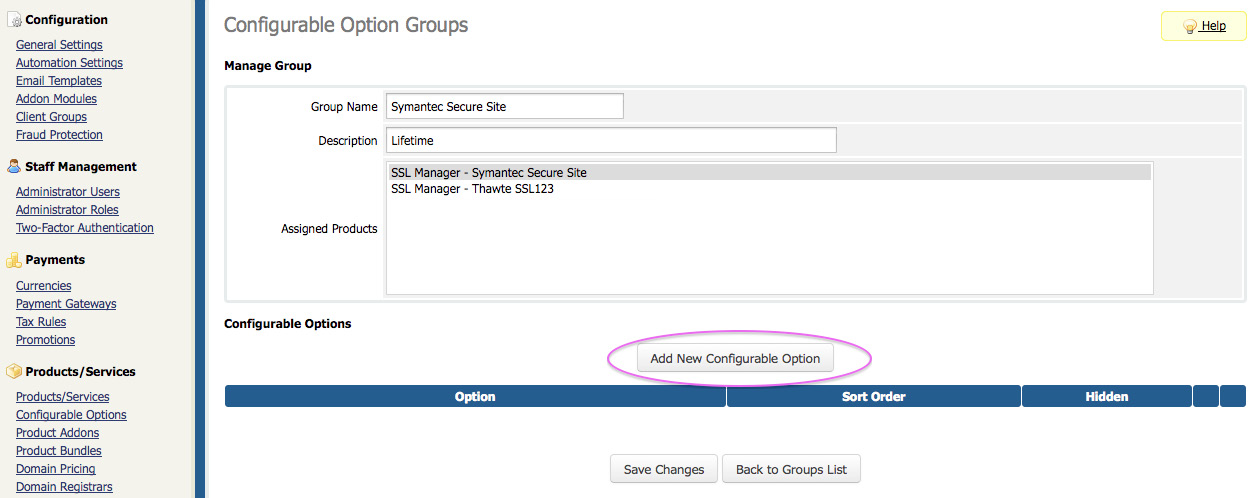
- Then click Add New Configurable Option. This will open a new window with the Configurable Options.
- Enter the Option Name Lifetime|Lifetime (months) and select the Option Type radio.
- Add an Option e.g. 12 for 12 months. Repeat this step for e.g. 24 and 36 months.
- Define prices for the assigned certificate and click Save Changes.
- Repeat these steps for each certificate and its pricing/lifetime.
If you switched from standard pricing to Configurable Option Pricing, you need to set the product pricing back to zero to avoid doubled prices!
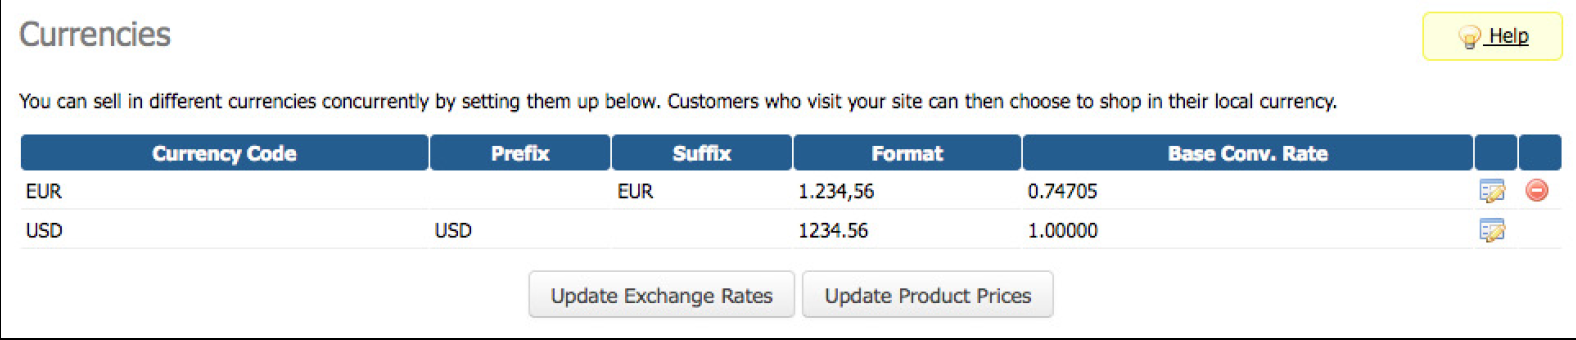
- You may need to check the settings for Currencies, e.g. dot or comma separated prices.
For further information on Configurable Options see: http://docs.whmcs.com/Addons_and_Configurable_Options
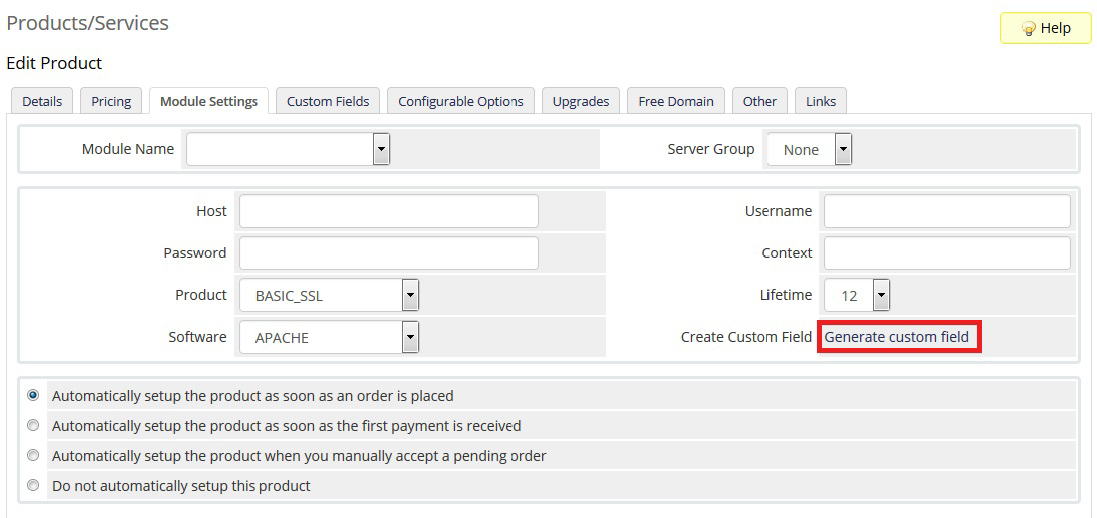
- In the Module Settings tab select InterNetX_SSL from the Module Name dropdown menu and click Save Changes.
- Now you can configure your product and its connection to the API. Fill in the Host, Username Password and Context fields with your API connection details.
- The regular InterNetX API URL is: gateway.autodns.com/.
- The SSL Context usually is “9”. The client can change the Software later on himself during the order process in the client area.
- Click Custom Fields in order to generate a custom field for the domain name, which allows the input of the TLS/SSL domain name during the order process in the client area.
For access to our demo system (sandbox) please contact sales@internetx.com.
Certificate request
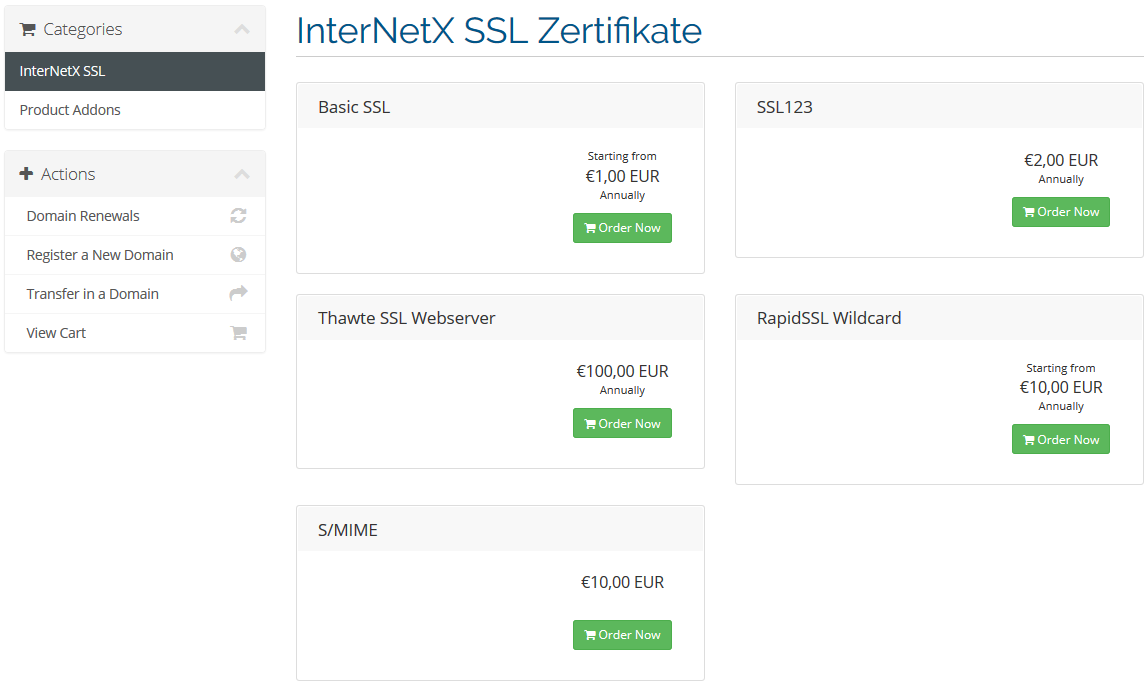
- To order a new certificate go to Client Area → Services → Order New Services and select the desired certificate.
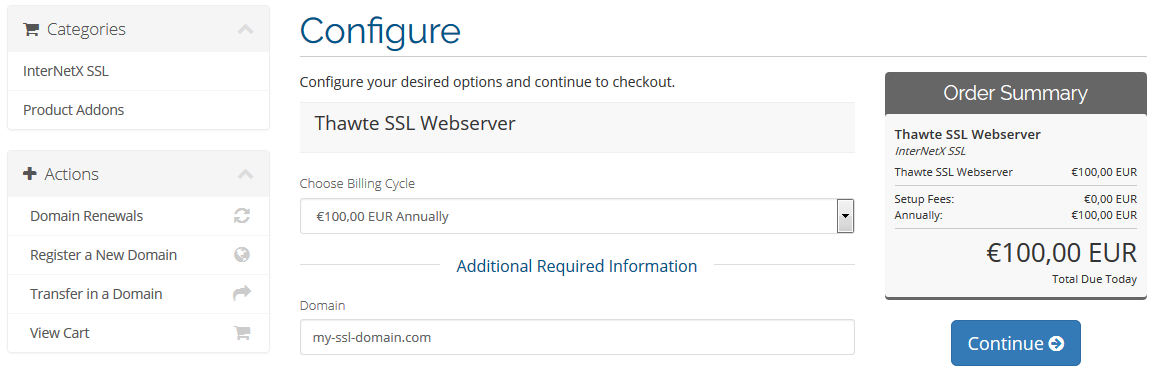
- Select the desired lifetime in the Choose Billing Cycle drop-down to and enter the domain for which the certificate should be issued.
- Click on Continue and proceed with checkout.
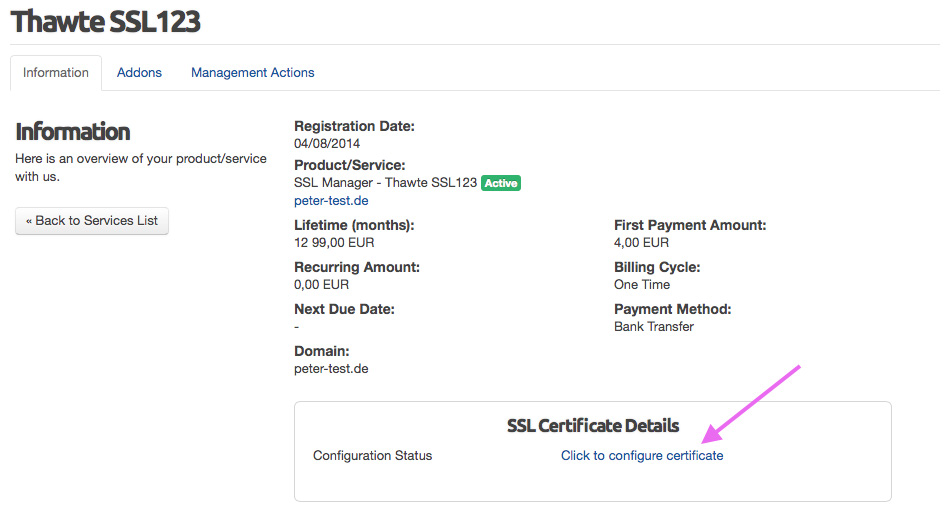
After successful checkout, payment and after activation of the order by the Admin, the Client is able to do the final configuration for the Certificate request in the Client Area. In order to send correct TLS/SSL certificate creation requests, your client has to provide the Certificate Signing Request (CSR). The certificate request will be used along with your client’s details in order to send the TLS/SSL certificate creation request.
- To start the certificate issuing process go to Client Area → Services → My Services and select the previously ordered certificate.
- Then go to Click to configure certificate.
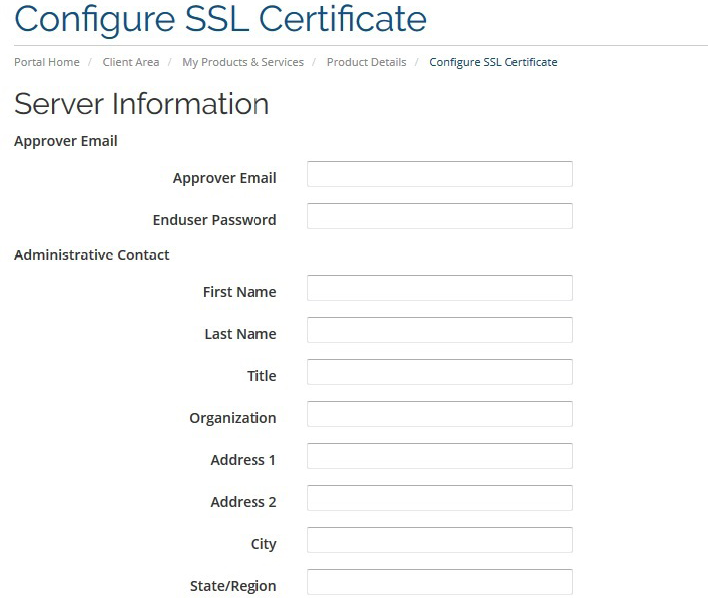
Configuration of S/MIME certificates
Please enter the desired S/MIME enduser password and the details of the Administrative Contact.
Certificate configuration
Configuration of TLS/SSL certificates
- Select the desired value from the Web Server Type drop-down menu and paste the previously generated certificate request into the field CSR on the following screen.
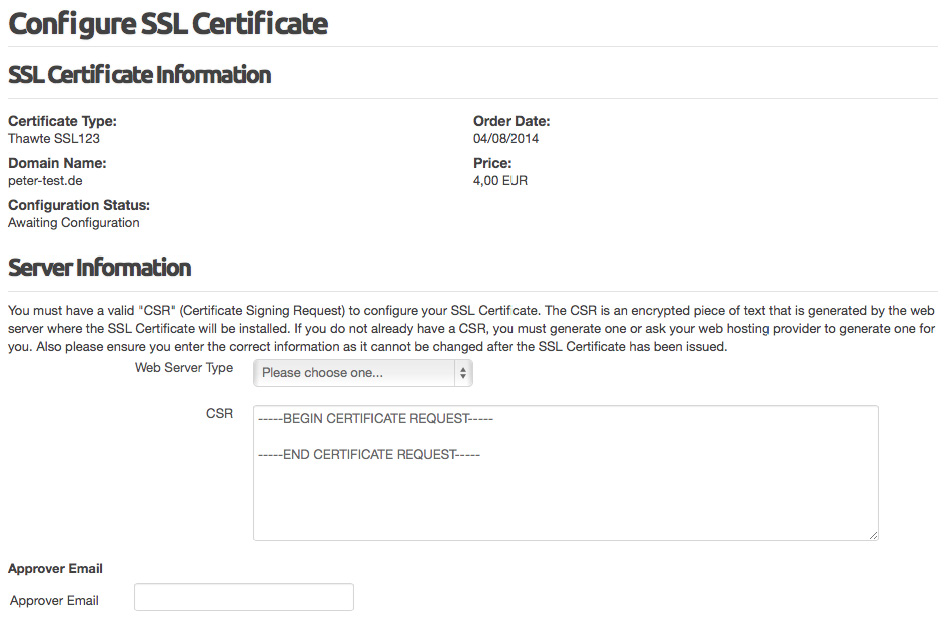
- Afterwards, fill the official administrative and technical contact fields. Complete this step by selecting Click to Continue.
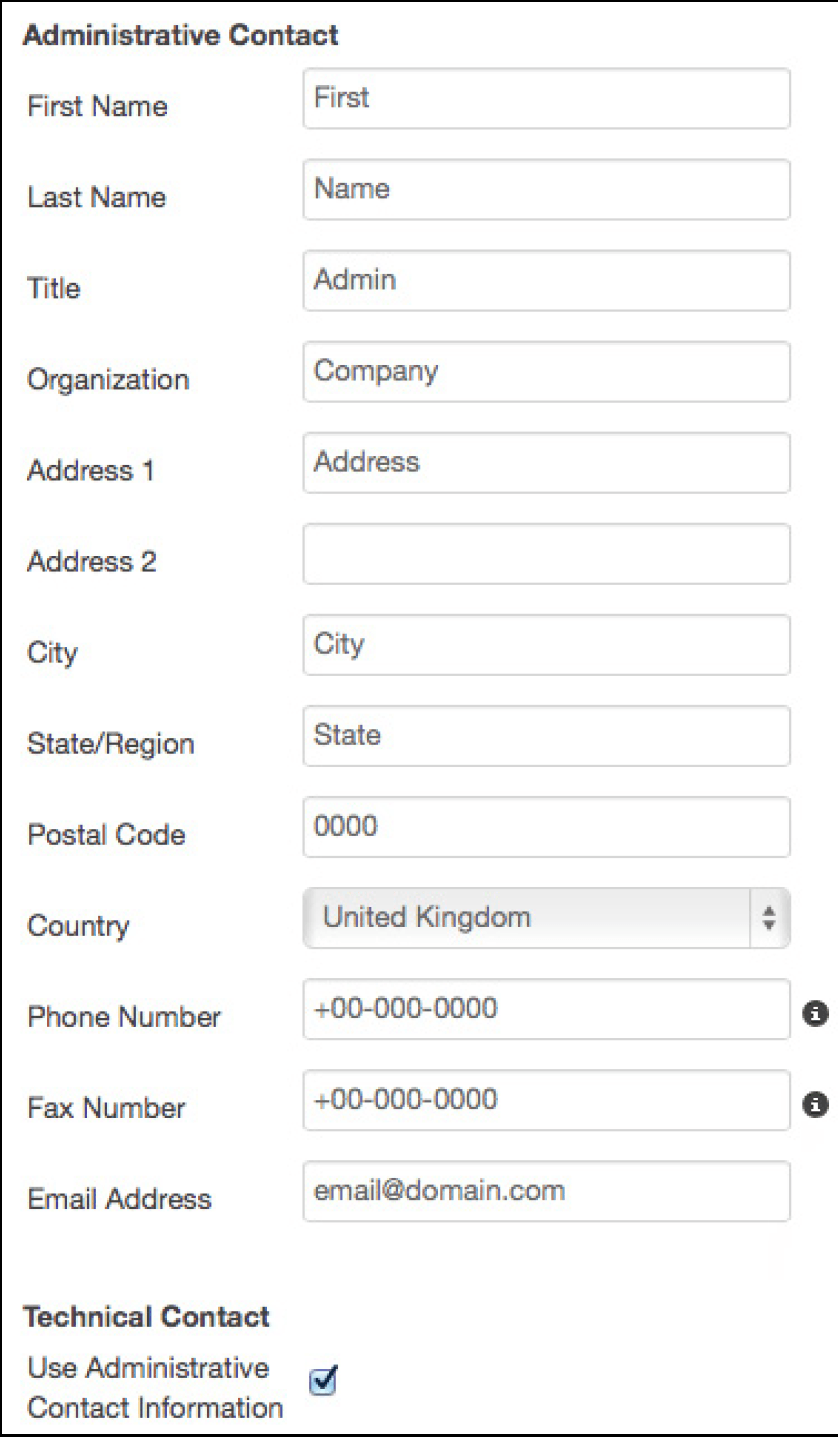
-
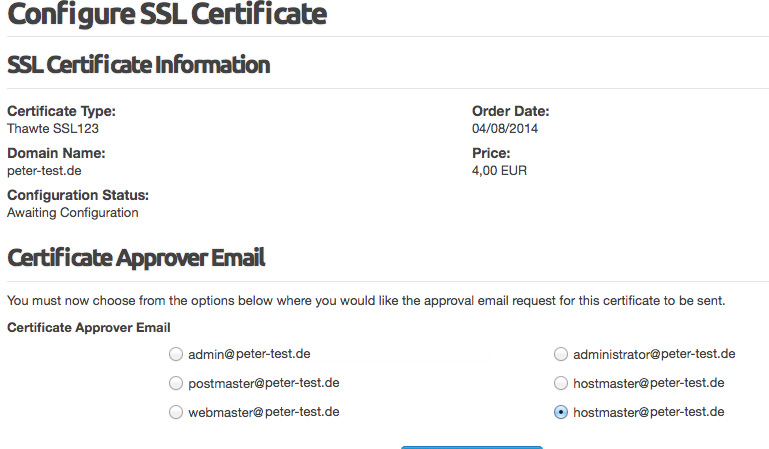
Now select the desired Certificate Approver Email and send the TLS/SSL certificate request by selecting Click to Continue.
You will be informed about the progress of ordering the TLS/SSL certificate through emails sent to the chosen email address.
-
Viewing your newly created TLS/SSL certificate in the client area
As soon as your certificate is issued, you will find basic information about it in your client area on the product details page.
Clicking the respective buttons shows the Contact details and the issued Certificate.
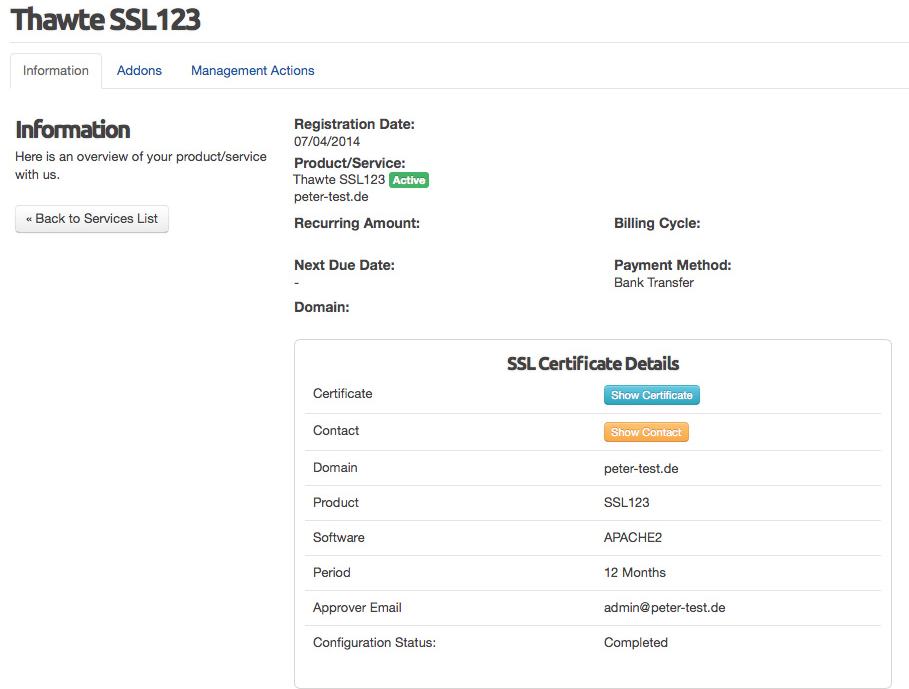
Viewing a newly created TLS/SSL certificate in the client area
As soon as your certificate is issued, you will find basic information about it in your client area on the product details page.
Clicking the respective buttons shows the contact details and the issued certificate.
Managing TLS/SSL certificates in the admin area
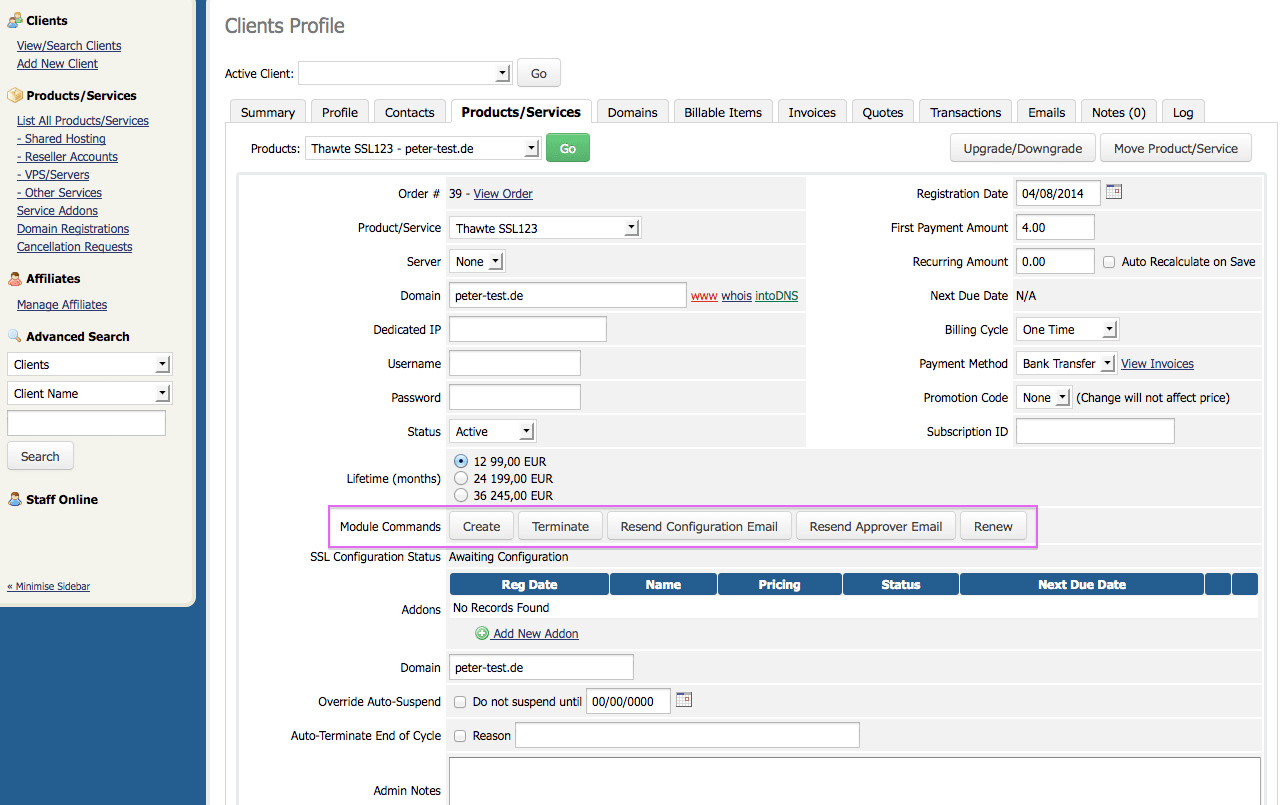
In the admin area you can easily manage the product status using Create, Renew and Terminate buttons. In addition, resending of the configuration and the approver emails is possible.
Was this article helpful?
Thanks for the feedback.